Saturday, March 5, 2011

Chocolate Bookmark Card

Today's share is a fun little card...and... it has a bookmark attached to it! I think it's the perfect pairing, chocolate to go along with a  good book to read.  I used the new set called Eat Chocolate that's in the Occasions Mini catalogue...such a cute stamp set for chocoholics like me {g}.  


The measurements for this card are 10 1/2" x 5 1/2" and I scored it at 4 1/4" and 8 1/2".  Then I ran the serated tool down the 8 1/2" score mark using my SU distressing tool, so that it easily pulls away from the card.  The chocolate on the front is stamped in chocolate chip ink and then I covered it with Crystal Effects.


The inside has a white layer, although it's hard to see in the picture.  When you tear the bookmark off you have a regular sized card...perfect for the book lovers in your life!

Thanks for stopping by, hope you're having a wonderful weekend!
Judy

Friday, March 4, 2011

2 More Stylish Blogger Awards.....for me!

Wow...I'm thrilled, excited and so honoured to recieve 2 awards...the first one is from my upline Alison and the second one is from Vanessa.  Thanks so much for the great award ladies!!


So, according to the rules of accepting the award, I thank the senders for the award and provide a link to their blogs, so please check out their blog links! (see above)

Secondly, I'm supposed to share 8 things about me that you don't know...ohmigosh...are you ready for this?  LOL!!

1. I believe in Elves, Faeries and Leprechauns and I love to wish on the Moon and the Stars. I also think Santa and the Easter bunny are pretty special too!

2. I’ve been on an incredible journey of love with my Mom that spanned more than 14 years while she had Alzheimer’s. My Mom continued to teach me so many important things, even though she lost her ability to talk to me....I miss her so much.

3. I always take the white bitty thing out of my eggs when I crack them...so did my Mom...it’s a weird family thing! So all of my cookies, cakes, etc are bitty free!  Aren't you glad you know that?

4. I think I am the only person ever to have calluses on my earlobes! My sweet little LilyBean loves to suck my ears and wakes me up each day for an early morning snuggle. I know...totally crazy...lol! I thought she would grow out of it, but she just snuggles into my neck and sucks my ears...lol....she is so sweet...I love her to bits!!

5. I love to cook and bake, and love to create my own recipes. I always shorten the recipes when I write them out, so they don’t look so long and complicated....like when the recipe says to place in pan or the oven...well...hello...where else would you put it? LOL

6. I’ve lived in a Palliative Care cancer ward for 6 weeks with my wonderful Mother in law. Her worst fear was being alone and that was something I could fix. I learned a lot during that time about so many things.... I will always cherish the time we shared together....I miss her too...

7. One of my favourite days was spent on the beach at Parksville, BC, with my kids and my husband. It was raining like crazy and we borrowed umbrellas from the hotel desk. We played barefoot on the beach in the rain, splashing in the waves and had the beach all to ourselves! Love those kinds of days.

8. You don’t want to watch a scary movie with me! I jump and scream when I get scared and that scares everyone else! My husband will say ‘Don’t watch’....well...seriously... I have to peek and even though I know something’s going to happen, it scares me anyway!

The last requirement and the most fun, is that I get to pass the award to 8 blog friends whose work I admire and let them know I've nominated them for this award.  It is so hard to narrow it down to 8 blogs as I follow lots of blogs and they are all fantastic.

 Here are my 8 choices in no particular order. Please visit their blogs and check out their fabulous creativity and make sure to leave them some love!


1)  Sandi http://www.sandimaciver.com/
2)  Kathy http://stampingstill.blogspot.com/ 
3)  Teneale http://www.tenealewilliams.com.au/wp02
4)  Jenn http://www.anewinkonlife.com/a-new-ink-on-life  
5)  Lisa http://addinkandstamp.blogspot.com/
6)  Tiffany http://www.mycraftyworld.blogspot.com/
7)  Kim http://riverfrontstampin.com/  
8)  Lois: http://mystampinplace.blogspot.com/

Thanks so much for stopping by and sharing your time with me!  Big hugs ~ Judy

Tuesday, March 1, 2011

Vancouver Regionals

This past weekend I went to my very first Stampin'Up! Regionals and I had such a good time!  We got a free stamp set called 'Nature's Walk' in our package as well as some great Make and Take projects.  It was an amazing day, meeting new friends and getting to know each other better.  We had some fabulous demonstrations, learned lots of new things and had a chance to share swaps with each other. 

Here's a picture of my swaps...I got some really great swaps in return.  The technique I used on my cards is from Kathy in Australia....she came up with this technique that she calls Grid Technique.  I absolutely fell in love with it.  Check out her blog here where she has an easy tutorial on how to do this as well as some awesome cards!  Thanks so much for sharing Kathy!  Love, love, love it!!


Here's a close up of my swaps.  I used Marina Mist/Very Vanilla, Pear Pizzaz/Very Vanilla and Crumb Cake/Very Vanilla.

I hope you try out this fun technique!  It's so much fun and gives such a lovely soft vintagy look. Thanks for stopping by to share your time with me!

Judy

Wednesday, February 23, 2011

Tea Anyone?

I saw this cute little tea bag on Allison's blog here and knew I just had to use the idea.  I just love how she put the hearts in the tea bag...so cute...a teabag filled with love! This was one of the cards we made for my Valentine's buffet and I love the softness of it. 


The Very Vanilla embossed layer is sponged with Baja Breeze...you have to get this Framed Tulips embossing folder if you don't already have it!  I stamped the Notably Ornate Frame in Going Gray, same for the teacups and the sentiment.
The little tea bag is made with our fantastic cardstock vellum with the small tag punch, secured at the top with a 1/2" circle folded in half and stapled.  Isn't it the cutest idea ever?  
The heart on the right hand side is done with the Heart Embosslit in pink and layered with a heart punch in Baja Breeze with the full Heart Punch.  Then I added a bow de fourchette with Baja Breeze seam binding ribbon and added a pink flower from the Itty Bitty Shapes Punch.
To finish the card, I added pearls to the centers of the hearts and flower and added some sparkle to the frame...it's so pretty in real life!  Hope you like it!
Thanks for stopping by!
Hugs ~ Judy

Friday, February 18, 2011

The Bow de Fourchette Tutorial 2

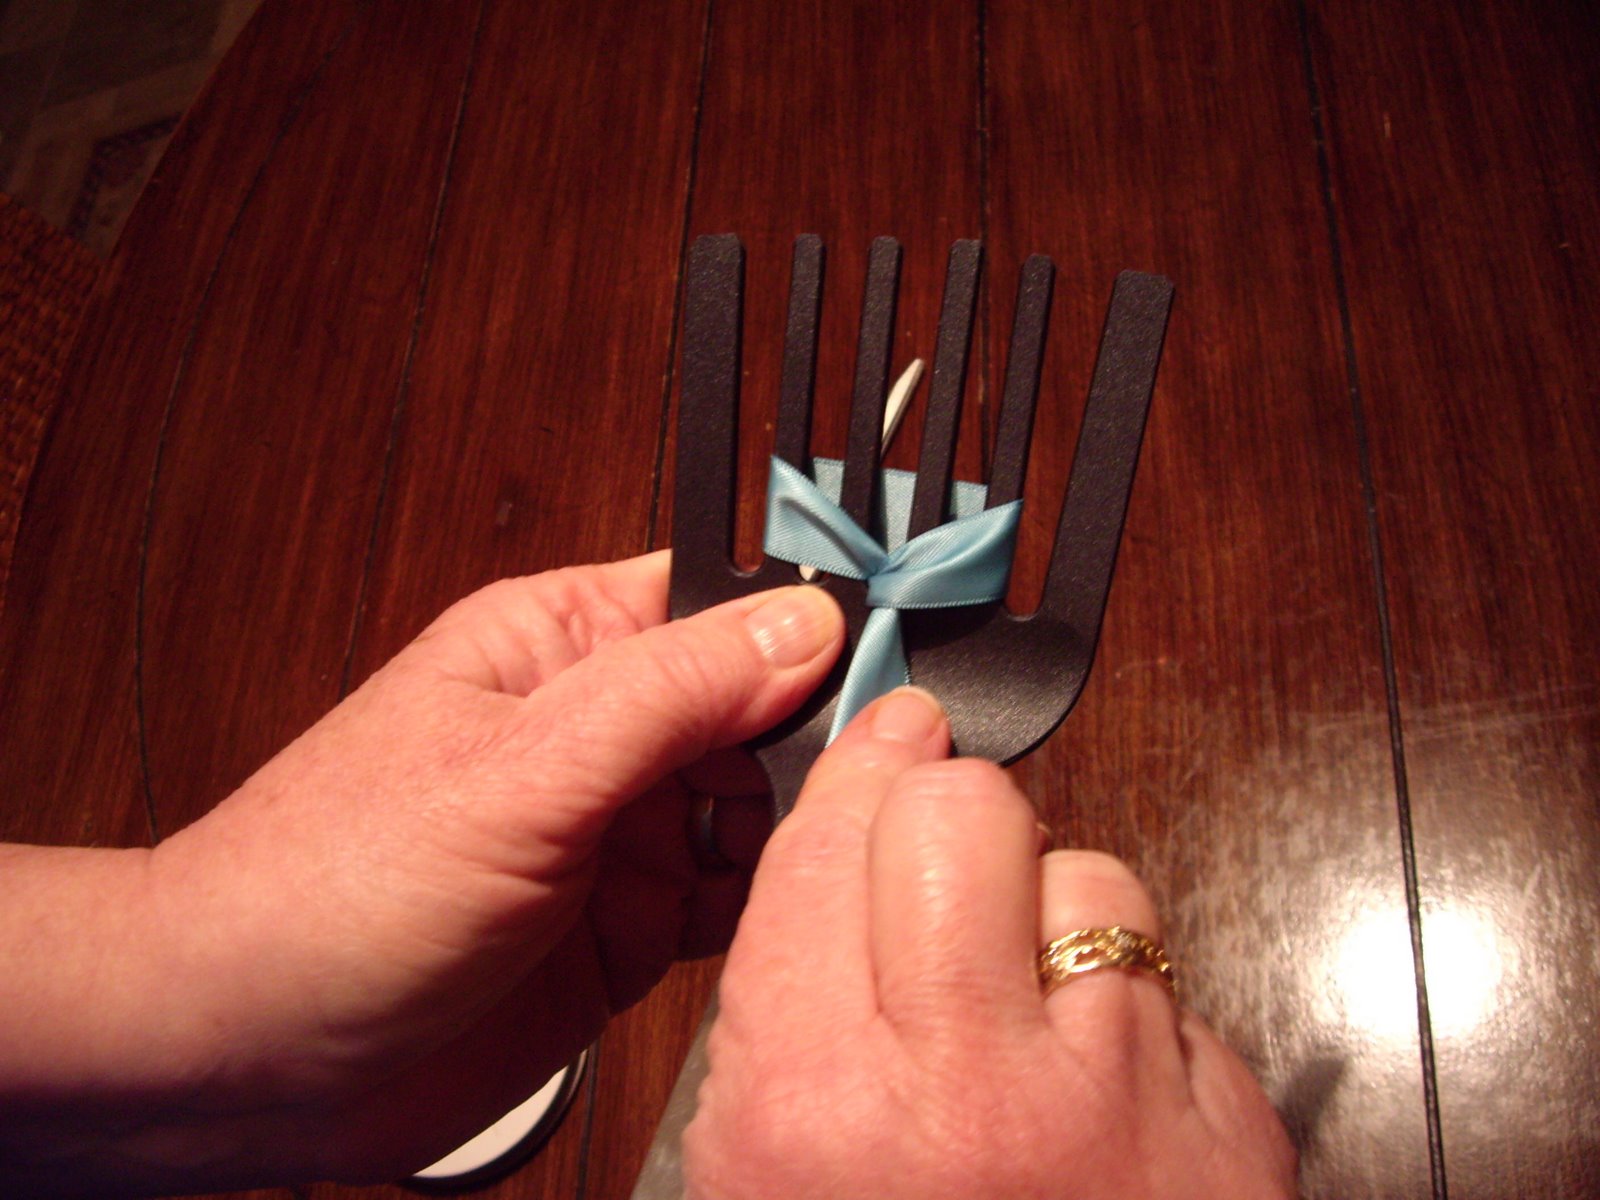
Okay...let's make some pretty satin bows!   Here is my other bow making tool! LOL!!  I found this at my local Dollar store and thought...hmmmm....amazing how you start to look a ordinary things differently when you're a paper crafter!  So I brought home this plastic spatula...I know it's not really called a spatula..but I can never think of the right name for it...so spatula it will be! 

I cut the top of the spatula edge off with our Craft and Rubber Scissors and then snipped off each side of the tines, if you click on the picture it will come up bigger for you.  I did this so it wouldn't have sharp edges, to snag the ribbon or cut my fingers!

The spatula has 6 tines, so for a perfect bow de fourchette with our satin ribbon you will just want to use the middle four tines.  To start your bow, insert your ribbon behind the middle four tines.


Just as the pink bow, bring your ribbon around the left hand side (matching the way your hand is curved) like a U shape.  Bring the back piece of ribbon over the front piece.

 
Now, thread the ribbon that you've brought forward from the back, through the middle space.  You will have 2 tines on either side.  Make sure your ribbon is straight.
Once again, you will pull the front ribbon tail down forming your bow, your back tail should be straight down too, in line with the handle.
Pull your front piece up and through the middle tines, making sure it's straight and looks symetrical.

When it's looking good, sometimes you have to adjust with your fingers, flip the spatula over.

Tie a single tight knot.
Slip off the spatula, you might need to squeeze the tines at the top just a bit, to ease the bow off. 

Now just trim your ends and you're done!

Once again....a beautiful, perfect bow!!  Using the bigger size ribbon and the spatula makes it very easy for beginners to learn how to make this bow. 
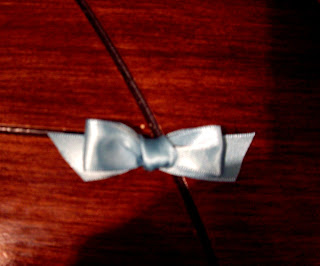
Here's the finished bow...I love it!!  If you don't have one of the lovely fancy bow makers, a spatula, a picnic fork, even one of those hair combs work great.  I've even made a little bow maker out of one of our wooden blocks, drilled little holes in it, spacing them evenly and inserted bamboo skewers, cut down of course, so you don't poke your eyes out with the point! 

So the picnic fork is great for smaller ribbons, like the tafetta, seam binding, etc. and the spatula is great for larger sized ribbons like our Satin Ribbon or the 5/8" Grosgrain ribbon....hope you have fun trying these out! 

One more tip:  I originally bought 2 spatulas...the one in the tutorial above and a much wider one...well... let me tell you that the wider spatula makes perfect bows for our wide 1 1/4" striped grosgrain!  Just remember to use your Craft and Rubber scissors for an easy cut and trim of the sharp edges! And just use the middle four tines....my husband has stopped asking what I'm doing when I'm in "create mode"!  LOL!!

Thanks for stopping by and sharing your time with me!
Hugs ~ Judy

Thursday, February 17, 2011

The Bow de Fourchette Tutorial

Finally...the bow tutorial I've been promising! 

This method of bow tying is not my original idea, but it's so much fun and you will get perfect bows every single time!

It's called the Fork Bow...but I felt that it really wasn't a great name for such a pretty bow...so at one of my Christmas card Buffets, we were brainstorming a name that sounded really nice and Jennifer came up with the name Bow de Fourchette, which is a blend of English and French...doesn't it sound lovely?

Here we go .... I don't have a fancy bow maker, but I found that a picnic fork is perfect for our Tafetta Ribbon.  (Tomorrow I'll share how to make perfect bows with our wider Satin Ribbon)

Step 1:  I like to keep my ribbon on the roll, now holding the fork in your left hand, wrap your ribbon, just as shown...it's easy to remember to have the side of the ribbon making the same shape as your left hand, like a sideways U.

 
Step 2: Take your back piece of ribbon and bring it over the top of the front piece.

 
Step 3:  With the ribbon coming to the front, thread it through the middle of the fork tines.

 
Step 4:  To form your bow, pull both the front and back tails straight down in line with the handle of the fork, adjusting to make sure it's not twisted.

 
Step 5: Keeping the back tail straight down, bring the front tail straight up and through the middle of the fork tines making sure it isn't twisted.

 
Step 6:  Now your tails are at the back of the fork, make any adjustments so that your bow is looking pretty...like straightening, etc.

 
Step 7. Flip your fork over, and tie a single knot.  Pull tight and slip off the fork! 

 
That's it!  A perfect Bow de Fourchette!!  Don't you just love this!!  Now you can admire your perfect bow and show all your friends!

Thanks for stopping by ~ Judy


Sunday, February 13, 2011

Happy Valentine's Day!

Happy Valentine's Day everyone! I hope you're having a wonderful day today and wish you all a happy heart! Whether you're celebrating or not...have fun!

This is a quick little card share for you, I used the swirl stamp in Baroque Motifs and gold embossed it.

To finish,  I added the hearts punched out with the Heart to Heart Punch, added rhinestones to the middles...hmmm...I see one of the rhinestones has shifted...lol! Then I drew a little gold line from the heart to the swirl. 

Enjoy your day and hug the ones you love!!  Thanks for stopping by ~

Judy