Wednesday, February 23, 2011

Tea Anyone?

I saw this cute little tea bag on Allison's blog here and knew I just had to use the idea.  I just love how she put the hearts in the tea bag...so cute...a teabag filled with love! This was one of the cards we made for my Valentine's buffet and I love the softness of it. 


The Very Vanilla embossed layer is sponged with Baja Breeze...you have to get this Framed Tulips embossing folder if you don't already have it!  I stamped the Notably Ornate Frame in Going Gray, same for the teacups and the sentiment.
The little tea bag is made with our fantastic cardstock vellum with the small tag punch, secured at the top with a 1/2" circle folded in half and stapled.  Isn't it the cutest idea ever?  
The heart on the right hand side is done with the Heart Embosslit in pink and layered with a heart punch in Baja Breeze with the full Heart Punch.  Then I added a bow de fourchette with Baja Breeze seam binding ribbon and added a pink flower from the Itty Bitty Shapes Punch.
To finish the card, I added pearls to the centers of the hearts and flower and added some sparkle to the frame...it's so pretty in real life!  Hope you like it!
Thanks for stopping by!
Hugs ~ Judy

Friday, February 18, 2011

The Bow de Fourchette Tutorial 2

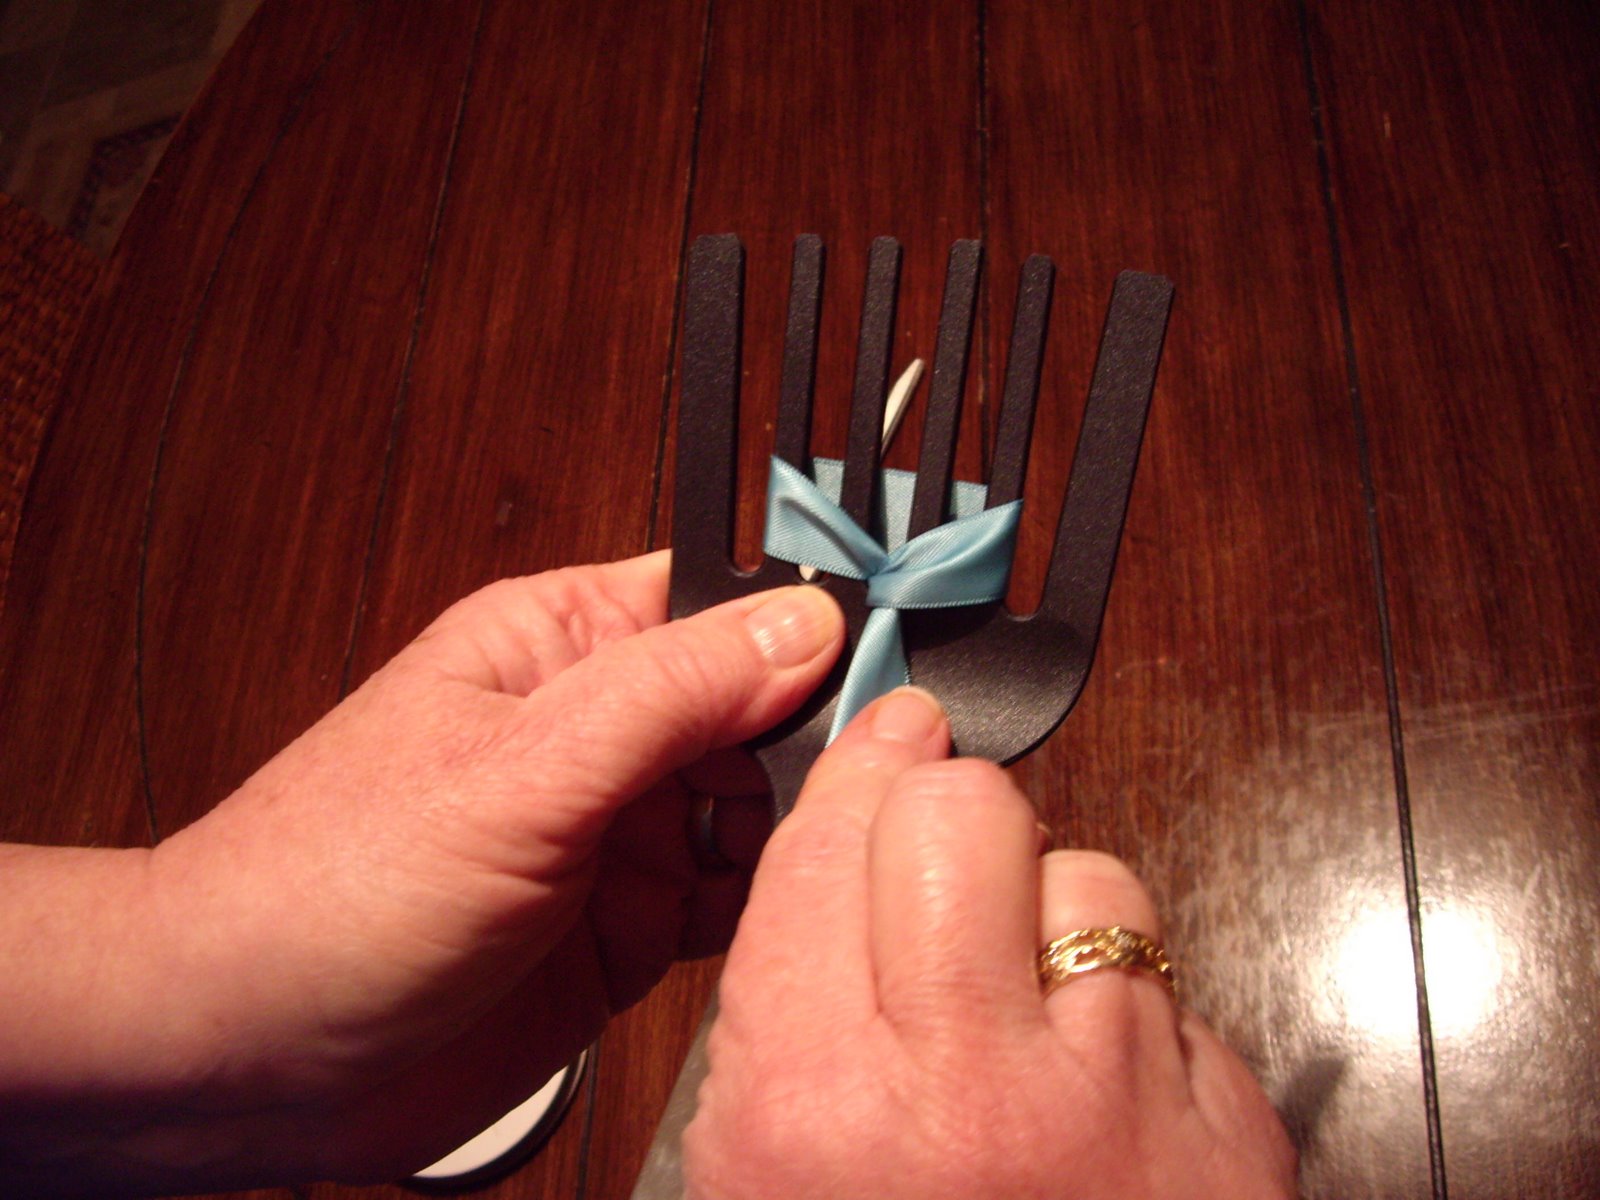
Okay...let's make some pretty satin bows!   Here is my other bow making tool! LOL!!  I found this at my local Dollar store and thought...hmmmm....amazing how you start to look a ordinary things differently when you're a paper crafter!  So I brought home this plastic spatula...I know it's not really called a spatula..but I can never think of the right name for it...so spatula it will be! 

I cut the top of the spatula edge off with our Craft and Rubber Scissors and then snipped off each side of the tines, if you click on the picture it will come up bigger for you.  I did this so it wouldn't have sharp edges, to snag the ribbon or cut my fingers!

The spatula has 6 tines, so for a perfect bow de fourchette with our satin ribbon you will just want to use the middle four tines.  To start your bow, insert your ribbon behind the middle four tines.


Just as the pink bow, bring your ribbon around the left hand side (matching the way your hand is curved) like a U shape.  Bring the back piece of ribbon over the front piece.

 
Now, thread the ribbon that you've brought forward from the back, through the middle space.  You will have 2 tines on either side.  Make sure your ribbon is straight.
Once again, you will pull the front ribbon tail down forming your bow, your back tail should be straight down too, in line with the handle.
Pull your front piece up and through the middle tines, making sure it's straight and looks symetrical.

When it's looking good, sometimes you have to adjust with your fingers, flip the spatula over.

Tie a single tight knot.
Slip off the spatula, you might need to squeeze the tines at the top just a bit, to ease the bow off. 

Now just trim your ends and you're done!

Once again....a beautiful, perfect bow!!  Using the bigger size ribbon and the spatula makes it very easy for beginners to learn how to make this bow. 
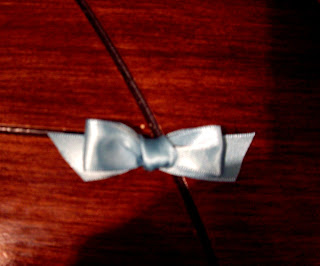
Here's the finished bow...I love it!!  If you don't have one of the lovely fancy bow makers, a spatula, a picnic fork, even one of those hair combs work great.  I've even made a little bow maker out of one of our wooden blocks, drilled little holes in it, spacing them evenly and inserted bamboo skewers, cut down of course, so you don't poke your eyes out with the point! 

So the picnic fork is great for smaller ribbons, like the tafetta, seam binding, etc. and the spatula is great for larger sized ribbons like our Satin Ribbon or the 5/8" Grosgrain ribbon....hope you have fun trying these out! 

One more tip:  I originally bought 2 spatulas...the one in the tutorial above and a much wider one...well... let me tell you that the wider spatula makes perfect bows for our wide 1 1/4" striped grosgrain!  Just remember to use your Craft and Rubber scissors for an easy cut and trim of the sharp edges! And just use the middle four tines....my husband has stopped asking what I'm doing when I'm in "create mode"!  LOL!!

Thanks for stopping by and sharing your time with me!
Hugs ~ Judy

Thursday, February 17, 2011

The Bow de Fourchette Tutorial

Finally...the bow tutorial I've been promising! 

This method of bow tying is not my original idea, but it's so much fun and you will get perfect bows every single time!

It's called the Fork Bow...but I felt that it really wasn't a great name for such a pretty bow...so at one of my Christmas card Buffets, we were brainstorming a name that sounded really nice and Jennifer came up with the name Bow de Fourchette, which is a blend of English and French...doesn't it sound lovely?

Here we go .... I don't have a fancy bow maker, but I found that a picnic fork is perfect for our Tafetta Ribbon.  (Tomorrow I'll share how to make perfect bows with our wider Satin Ribbon)

Step 1:  I like to keep my ribbon on the roll, now holding the fork in your left hand, wrap your ribbon, just as shown...it's easy to remember to have the side of the ribbon making the same shape as your left hand, like a sideways U.

 
Step 2: Take your back piece of ribbon and bring it over the top of the front piece.

 
Step 3:  With the ribbon coming to the front, thread it through the middle of the fork tines.

 
Step 4:  To form your bow, pull both the front and back tails straight down in line with the handle of the fork, adjusting to make sure it's not twisted.

 
Step 5: Keeping the back tail straight down, bring the front tail straight up and through the middle of the fork tines making sure it isn't twisted.

 
Step 6:  Now your tails are at the back of the fork, make any adjustments so that your bow is looking pretty...like straightening, etc.

 
Step 7. Flip your fork over, and tie a single knot.  Pull tight and slip off the fork! 

 
That's it!  A perfect Bow de Fourchette!!  Don't you just love this!!  Now you can admire your perfect bow and show all your friends!

Thanks for stopping by ~ Judy


Sunday, February 13, 2011

Happy Valentine's Day!

Happy Valentine's Day everyone! I hope you're having a wonderful day today and wish you all a happy heart! Whether you're celebrating or not...have fun!

This is a quick little card share for you, I used the swirl stamp in Baroque Motifs and gold embossed it.

To finish,  I added the hearts punched out with the Heart to Heart Punch, added rhinestones to the middles...hmmm...I see one of the rhinestones has shifted...lol! Then I drew a little gold line from the heart to the swirl. 

Enjoy your day and hug the ones you love!!  Thanks for stopping by ~

Judy

Saturday, February 12, 2011

Romantic Love

Happy Saturday everyone! It's a cozy rainy day here on the westcoast...perfect for stamping! 

My card today turned out to be one of my absolute favourite things!  It was so easy to make, I used the Textured Tulip Embossing folder...this is at the top of my fave's list and the magnetic heart from the Punch Windows dies that fit into the Movers and Shapers.

I also used the Punch Potpourri Heart stamp, this is a hostess set, and the sentiment on the front is from the I {Love} Love Jumbo Wheel...I have 2, one for wheeling and one I pulled off the wheel and cut up, getting 19 beautiful stamps!  I used Basic Gray ink and the embosslit heart cut in black.

 
For the base of the card I used a 4 1/4" x 11" base, folded at 5 1/2".  Then on the front piece I folded it again at 2 3/4".  With the magnetic heart in the movers and shapers die, I lined up the middle of the heart with my 2 3/4" fold....carefully unfolded that piece to cover the heart and then lined up my cutting plate just to the fold line.  Run it through your Big Shot and you have the base of the card done!

At this point I folded the 2 3/4" front back so that the heart cut out was showing and carefully lined it up in my Textured Tulip folder and ran it through the Big Shot again.

To finish it, I coloured the flowers and stems with my markers using Blushing Bride and Pear Pizzaz.  I first outlined my flowers with the pen tip of my marker, making it easier to see where I wanted to colour it, then I filled it in with the brush tip. 

The sentiment inside is from Occasional Quotes, a hostess level 3 set.  I added a bow de fourchette (aka fork bow!) to the front, positioning it so that it would be visible from the inside as well as the outside and this was made with Whisper White Taffeta Ribbon.


The last step was to add a 5 1/2 x 4 1/4 base to the back of the card to cover the debossed back and to give it a more finished look as well as making it a bit heavier.

I hope you enjoyed this card!  Thanks for stopping by and sharing your time with me!
Hugs ~ Judy

Friday, February 11, 2011

I love this card!

Do you ever come across something so pretty that you just have to case it? That's exactly what happened to me when I saw this beautiful card!  Seriously...I just love this So Saffron Valentine's card!


Here's the link to Debra's card.  The only things I did different to make this card... I added a heart to the top, I changed the glitter brad to an antique brad and I didn't brayer the embossed folder.

I challenged myself to make a card that would not have any layers on it....so I only embossed the card front but then I gave up my challenge when I had to put the printed paper on it!  LOL!! 

Thanks for the inspiration Debra!  Love, love, love this card!  The heart is in the Occasions Mini catalogue and the flower outline stamp (on the printed paper) is from the Always stamp set.  The little sentiment is from Tiny Tags.  The embossing folder is the new Textured Impressions Framed Tulip...absolutely one of my favourite things!!

Thanks for stopping by and sharing your time with me!
Judy

Thursday, February 10, 2011

Chocolate Truffles for your Valentine!

Can you believe that Valentine's Day is nearly here?  Oh my...where is the time going?  If you are celebrating February 14th, this is a recipe that is guaranteed to melt your Valentine's heart!

These scrumptious little bites of chocolate are so easy to make and soooo good!  This time I decorated the half of the tops with crushed oreo cookies and the other half I did with pink salt...trust me...it's seriously yummy! 
I originally got the recipe from Kraftcanada...but there are lots of versions on the internet!  This is my updated version from my recipe files and it makes about 4 dozen:

Easy Oreo Truffles
1- large bag of chocolate Oreo cookies
1- 8 oz package of Cream Cheese
Chocolate wafers (Milk and white chocolate)

Crush the cookies in your food processor until they are fine crumbs. (reserving a couple of tablespoons for the topping)

Add block of cream cheese, to cookie crumbs and pulse until it's well blended.  At this point I usually put it into the fridge for 30 minutes or so...just so it's chilled.

Roll the mixture into 1" balls and place on parchment lined cookie sheet, place back in fridge until chilled again.

Melt chocolate wafers in a microwave bowl, drop truffle into chocolate and make sure it's well covered.  Remove the truffle from chocolate with 2 forks and place on wax paper....and sprinkle with chocolate crumbs or pink salt.  Then keep in the fridge until you are ready to serve...that's it....sooo yummy!

To make the salt, I used coarse salt...like the kind I use for homemade pretzels.  Put some salt in a baggie and add a few drops of red food colouring.  Sprinkle on chocolate covered truffles!

You can also melt chocolate in a baggie and pierce on end of the baggie with a toothpick and drizzle white chocolate on dark truffles or dark chocolate on white truffles.

I bet you can't eat just one!!  Enjoy!!

Thanks for stopping by and sharing your time with me!
Judy