Friday, September 30, 2011

Covering up my mistakes!!

Well, here we are on the last day of September! I can't believe how fast time is flying by. I'm very excited about October coming up. It's one of my favourite months, the leaves are starting to turn colour and it's time to cozy up by the fire with a good book or to tuck yourself up in your crafting space and create!

Here's a card I've been meaning to share with you, I really love it and I created it by trying to cover up the couple of mistakes I made!   Can you see them?   If you click on the picture you might find some of them! But mistakes are always...well most always (lol) good, it makes you think of how to save your card and sometimes it turns out better than you expected!

First of all I tore the Newsprint designer paper and layered it on the White cardstock, then I stamped the beautiful wooden bench from 'Have a Seat' over the seam....ugh...it looked awful!  So I ran it through my Vintage Wallpaper Embossing folder and it looked worse!  I ran a light sponge over it all and punched the label to hide the bench. But while I was sponging the embossed background, some of the black ink got on the heel of my hand and made a blotch so I covered it with the birdcage.

I took out my Fabulous Florets and did the reinker technique. I embossed the flowers in black and coloured them with Cherry Cobble reinker.... but couldn't find my embossing buddy sooo of course I got some black bits inside the flower petals....so I got out my Cherry Cobbler marker and added some details to cover up the black embossing bits...I like it!! 

To finish it up, I added a little red bird to balance the flowers and needed some Little Sizzlet leaves to cover the bench leg that was still sticking out!

I had some trouble with this card but really, really like how it turned out!  Isn't it amazing how you start out going in one direction and all of a sudden you are doing something completely different!  That's what I love about crafting and life...full of surprises...LOL!!

Thanks so much for stopping by and sharing your time with me!  I love it when you have time to visit with me!!

Hugs ~ Judy


Sunday, September 18, 2011

Finally....

Hi everyone! I've had so many lovely comments on the anniversary card I made for my daughter and son in law, I just want to say thank you so much for letting me know how much you liked my card! I love your comments and emails and read every one!

Here's the tutorial on how I made the roses, oh my, I said next week and that was 3 weeks ago...so sorry for the delay!! I started out by quilling the roses from scraps and then when I finished, I realized they wouldn't fit in the envelope and so I had to come up with plan B. My Tombow glue was sitting on my craft table and so I reached for it and here's what happened!


This is a picture of my quilling tools, I got them at my local big craft store, if you can't find any of these little tools near you I'm sure you could make your own by snipping off eye of a tapestry needle and inserting it in a soft wood dowel. Anyway, I found 2 and I gave the blue one to my daughter...mine is the little metal one...I love it!

This sample is Whisper White... I've tried to pick the best pictures that my daughter took while I was making the tutorial!
I punched out circles from scraps, these are really small roses.....this one is Very Vanilla stamped with En Francais background in Crumb Cake. Then I cut the circle in a spiral to the centre...

So I basically cut with my scissors in a spiral, just randomly and left a little piece at the end for a glue dot...this is what it looks like when I'm finished cutting.


I insert my quilling tool on the very tip of the outside edge and start to roll.....

and roll.......

and roll.....


When I'm finished rolling it all up, I let it rest on my finger tip to let it relax and unroll just a bit ...


Then I place a glue dot on the end....

And press it gently so that it catches the rolled layers of the flower at the base.

 
This is what it looks like....pretty eh?

This is me looking at it and thinking that it's going to be a very lumpy envelope.....oh and also a very unattractive picture of my fingernail...it got smashed in a door years ago when the wind caught it just as my son (who was about 3) was running through it....so I of course put my hand out to stop the door from slamming on him...it slammed on my finger instead!


And here is where I spotted my Tombow and thought hmmmmmm....


Here's me really applying pressure with the bottom of the tombow to smash my pretty rose....


And here....gasp....the reveal!! I love it....I think it's beautiful and it will fit into the envelope as well!


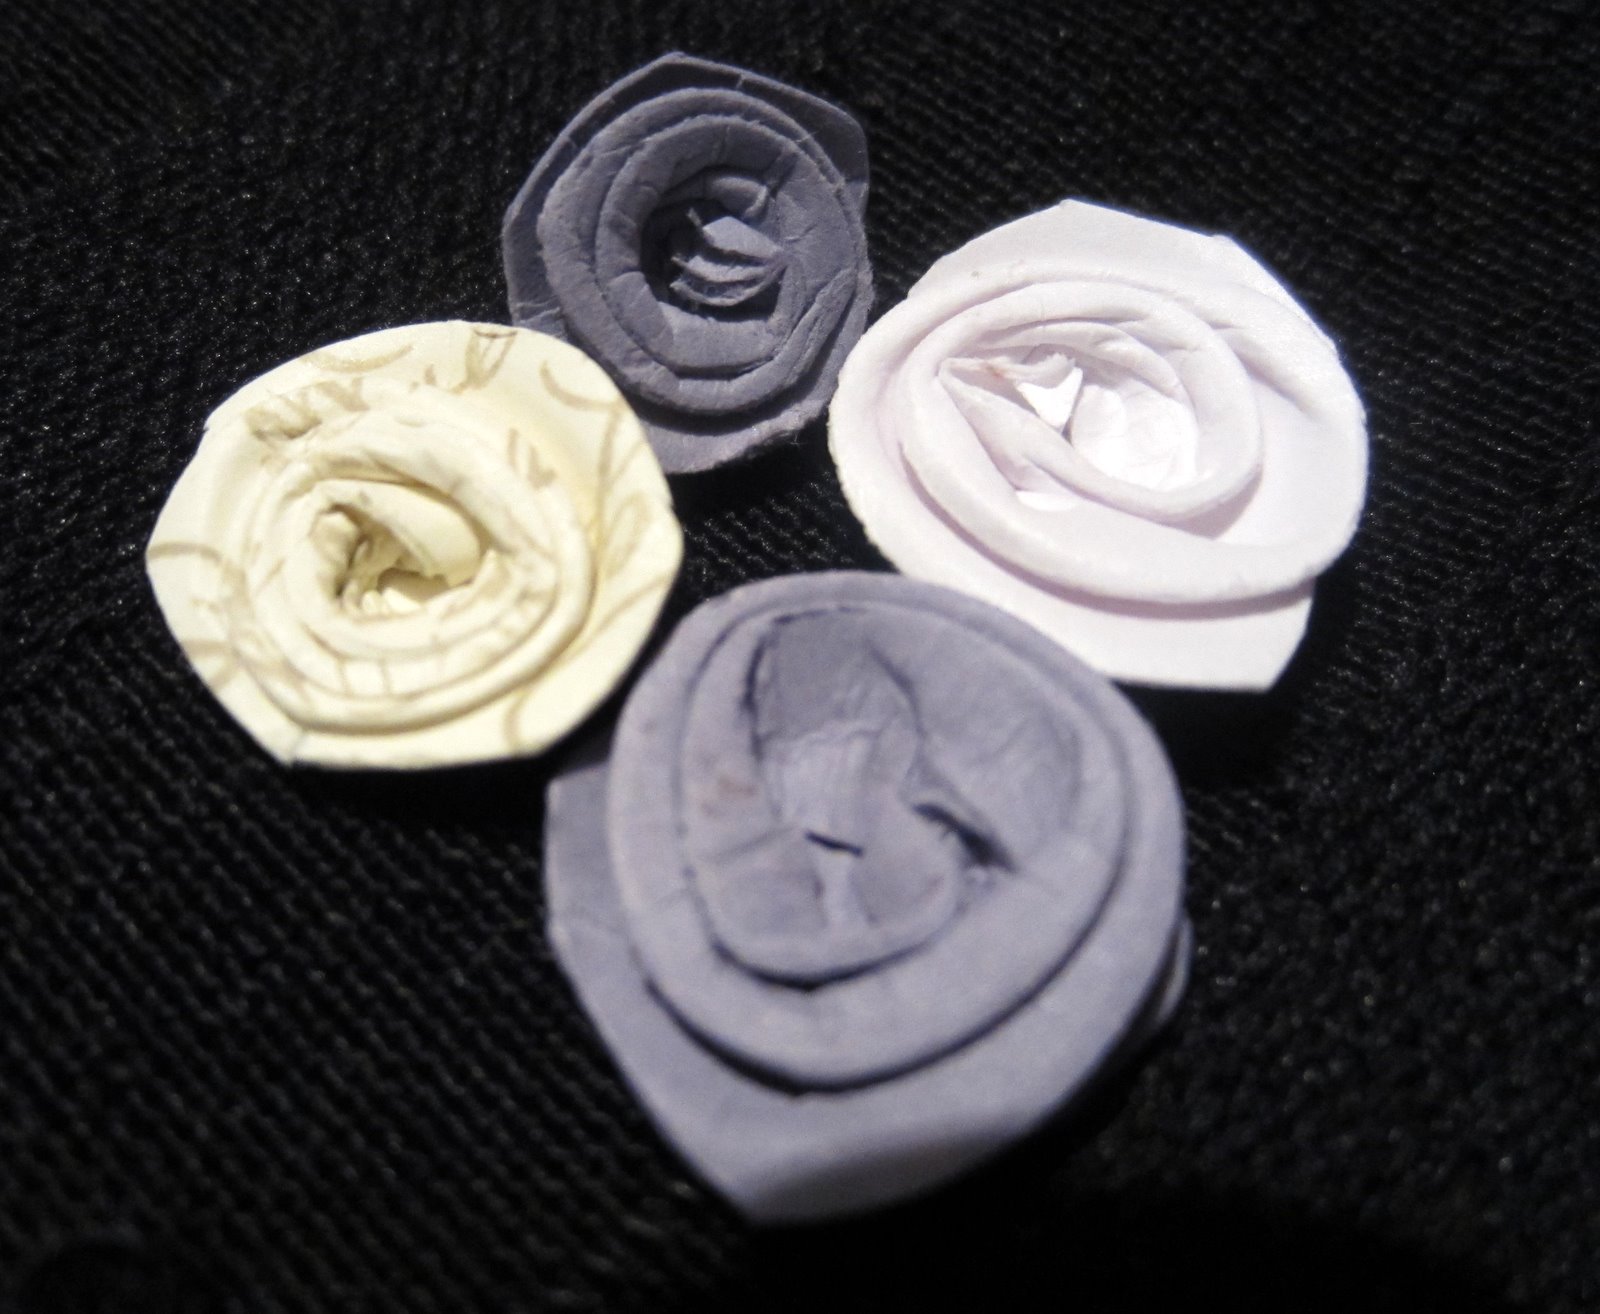
This is a picture of a 3/4" Wisteria Wonder smashed rose...it's pretty just as it is or would be lovely with a dab of Dazzling Details, or Dazzling Diamonds or even a pearl in the centre.


This is just to show you the two sizes I used for the anniversary card and of course those roses were all in white. You could make them any size but the bigger the circle the bigger the smashing tool would be...even the bottom of a jar would work great.


And since this is such a long tutorial...what the heck....I'm including a close up picture of the finished rose that's got the En Francais script stamped on it...so pretty!


And to finish, I' m including a picture of a little grouping of my smashed roses, as you can see they turn out a little different every time! I hope you like them and enjoyed my long tutorial and hope you try to make some too...don't throw out your scraps...they are perfect for making these little gems!
Thanks so much for stopping by and sharing your time with me!
Hugs ~ Judy

Wednesday, August 31, 2011

How do you like these roses?

Hi everyone...ohmigosh...it's the last day of August, I can't believe it! The weather is beautiful and next week the kiddies are back in school and it seems like its the time to settle down to a routine.  I honestly don't know what a routine is, but it sounds good!

It was my daughter and son-in-laws 4th wedding anniversary a couple of weeks ago and this is the card I made for them.  I had so much fun making these little roses....I've been calling them smashed roses althought that's not really a great name, but it's how you make them!  I hope to have a tutorial up next week on how I made these, they are so much fun and so addicting!


The background is embossed with an embossing folder I picked up a few weeks ago  The oval is a Nestability and the sentiment is a retired Stampin'Up set called Everything Nice.  The leaves are from an old punch I have and the ribbon is Stampin' Up!  Whisper White Satin.  I used the new Dazzling Details on the inside of the roses too....love this new product!

Hope you like it and I hope you are enjoying these last days of summer....I wishing for an Indian summer, beautiful sunny days, not too warm, lovely coloured leaves on the trees and that wonderful crisp smell to the air that we sometimes get in September....and no rain would be lovely!! 

Thanks so much for stopping by to share your time with me!  Crafty hugs to you ~  Judy

Tuesday, August 16, 2011

Summer Splash Tag

Happy Tuesday!  Here's another tag to share with you, I am using the Summer Splash stamp set again....I think it's so darn cute! 

I stamped the surfboards with the new and fabulous Calypso Coral Ink on Naturals White cardstock. Then I tore a piece of Crumb Cake cardstock and sponged it with Basic Brown ink and did a couple of layers and adhered them to the tag. 

I ran a glue pen over it and sprinked the decorator sand on top.  I got the decorator sand in the floral department of Michaels...I could have got some from the beach, but I figured the sand in the bag would be cleaner...not so germy...lol!!


I got the little starfish in a jar from a furniture store...mind you it was a couple of years ago, the store was Urban Barn (in Canada) and it was in the candle section...you never know what kind of goodies you might find on your travels!  I had no idea what I was going to do with them until I got this cute stamp set! 

The sentiment is from the stamp set Thank You Kindly and the ribbon is our yummy Crumb Cake Taffeta ribbon....I am so glad this colour ribbon came back!!

Thanks so much for stopping by, hope you are having a wonderful week!
Hugs Judy

Saturday, August 13, 2011

Summer Splash

I love this little stamp set!  This 4" x 4" card was so much fun to make... I added a strip of Marina Mist satin ribbon and then added the Marina Mist scallop circle and the 1 3/8" white circle punch on top after I stamped the sand pail image in Marina Mist. I stamped the sand pail again on Marina Mist cardstock and cut it out and popped it up with dimensionals. To add a bit of dimension I dotted green tombow glue to the inside of the pail and sprinkled clear beads on top...kinda looks like sea foam bubbles!  If you click on the picture you'll get a close up view {g}

Then I coloured the sand area with Crumb Cake marker and added glue pen over it and sprinkled some decorator sand on top...so cute in real life!  The sand dollar is stamped in Blushing Bride and cut out with the Itty Bitty circle punch and the shell is stamped in Crumb Cake and cut out.


I cut the inside layer at 3 3/4" x 7 1/2" and folded it in half.  In the middle of the scored side I placed a 1" square of cardstock and cut from the fold side up to 1" on either side of the square template.  This forms the little pop up...so cute eh! 

I stamped the sentiment from the stamp set Bold Blossom...both of the sets are in the current Summer Mini.  Then I added some more little cut out pieces.  I hope this all makes sense...I'm tired tonight! LOL!!


I hope you like todays card and hope you give the easy little pop out card a try!  Thanks for stopping by and sharing your time with me!  Hope its sunny and warm wherever you live and you have a beach close by to play at!

Hugs ~ Judy

Thursday, August 4, 2011

Lovely Roses

Hi everyone!   Here is a card I made using the Re-inker Spread Technique created and generously shared by Crystal French.  It's such a fun technique to do and I've include the instructions below for you.   I found it's really important to use the Shimmery white cardstock as the water pools really nicely on it and after it's dry you can see the shimmer through the paint....totally fun! 

The stamp set is Fifth Avenue Floral and the leaves are from Autumn Spendor.  The sentiment is retired.  I used the Tulip Frame Embossing folder and it's always a perfect addition to any card!  I was thinking after I'd finished this card that I should have embossed the photo corners too.


Embossed Reinker Spread Technique by Crystal French
  1. Stamp an outline image with white craft ink or Versamark onto Shimmery White cardstock.
  2. Sprinkle with white/black embossing powder and pour excess back into container.
  3. Heat with heat gun until powder melts; let cool.
Now you're ready to go ahead with the "Reinker Spread Technique


Reinker Spread Technique:
  1. Choose 3 colors of Classic reinker. Put a drop of each reinker in separate well in a paint tray. 
  2. Have a misting bottle filled with water, an aqua-painter and a paper towel ready.
  3. Spray the embossed shimmery cardstock with water until it is saturated and there are pools of water in the embossed areas.
  4. Moving quickly, dip the aqua painter into the darkest color of reinker and tap it into a pool of water on the embossed image. The reinker will spread across the pool of water. For the best results, start in the center of a flower or the edge of the image to allow the reinker to flow across the image.
  5. Reapply reinker after each dip and continue with the same color as desired
  6. Clean the aqua painter and start with the second and then the third color.


Here's a sample of other colours I used, the half rose on the left is done with only Calypso Coral and I just played with different intensities....pretty eh!  The half rose on the right turned out so cool, I couldn't believe the way the colours mixed together, beautiful shades of pink, blues and purples....love this one! 


I love the soft colours of the samples below too...it's amazing what it looks like as you're doing the technque and then it looks different yet again once it's dried.

The rose below shows how your painted piece will look before it's cut out....not that great looking but once you've cut it out and mounted it on your card with dimensionals, it's totally fantastic!
 Just a little tip from me to you....and this is what I've learned to do {g} when I'm stamping flowers, I usually stamp a whole sheet and then when I paint them, I jot down on my flower what colour combos I've used, then when it comes time to use them to make a card, I don't have to rely on my ever fading memory and it's super easy to match up colours.


I really hope you give this Wow technique a try, it's really fun and easy and so impressive in real life!
Thanks so much for stopping by and sharing your time with me!
Hugs ~ Judy

Friday, July 29, 2011

French Foliage....my fave!!

Hi again...another quick share for you today! This is one of the tags I made for my customers orders last time...I absolutely love the stamp set French Foliage and one of my fave colour combos is Very Vanilla and Crumb Cake Ink....love it!


The background of the Very Vanilla tag is stamped with the script from the stamp set and the sentiment is from the stamp set Thank you Kindly...it is a perfect on this tag!

The flower is from my stash, I found package of them at the local Dollar store....I should have bought more, they are so pretty!
The ribbon is also from my stash....I have lots of goodies in my stash, it's like a treasure trove!
Thanks for stopping by and sharing your time with me!

Hugs ~ Judy